EVA Pattern Prototype
try in foam before cutting leather
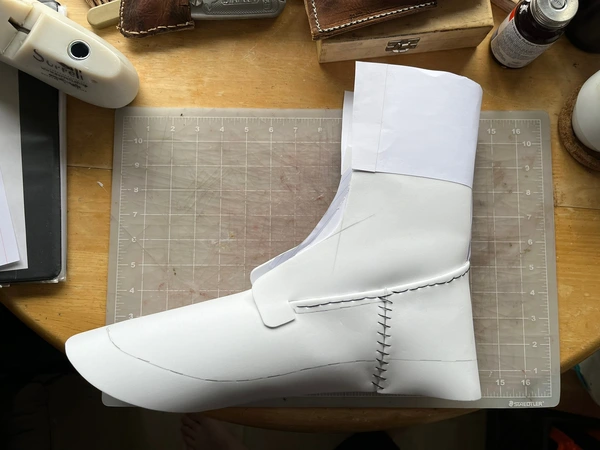
I’m attempting a somewhat unusual pattern for my second pair, and thought to try my taped-last, “mean forme” pattern out in ethyl-vinyl acetate foam before cutting leather. I used card stock for my first pair, but it was clunky, and I missed some chances to improve the pattern.
Based on the leather I intend to use, I bought some 2-millimeter-thick white ethyl-vinyl acetate foam online. That was the nearest available thickness to my intended leather plus intended lining. A 15×39-inch roll cost about $10 USD. I have about 13 inches left completely uncut, plus scraps, after the job. I’d have more if I hadn’t cut the tongue in foam, about which more below. Also if my feet weren’t 11½ inches long.
Lessons
It was very easy to trace pattern lines onto the white foam with pencil.
For gluing together, medium cyanoacrylate worked the best of the glues I tried. The bottle said 10 seconds to dry, but holding for 20 worked better.
Skiving fold-over allowances didn’t really work, even with a very sharp knife. But it was easy to fold edges over even at full thickness.
Basting with thread worked well. So did just pouring glue into the seams once fastened. I’m not sure either was necessary, even to put my foot into the prototype. You may notice in the photos that I saddle stitched—actually I did a running stitch, then realized I still had thread and double back. That definitely wasn’t necessary.
I also tried doing the gusset tongue in foam. The pattern wasn’t right, and that became clear, but the foam clearly can’t bend or stretch ideally, either. I will try again using fabric.
Adding onto the foam with pieces of card stock also worked well. Medium cyanoacrylate worked well here again.
I thought I might leave out the lasting allowances to save foam, but I’m glad I didn’t. Laying over the last gave me confidence.
The Pattern
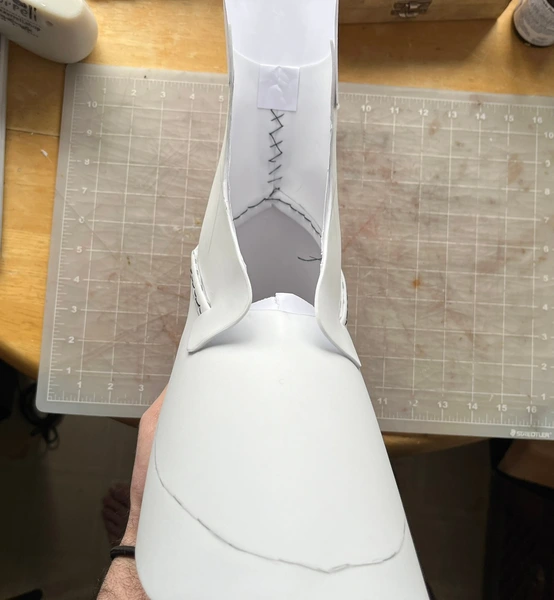
Just like on my first pair, the curves at the front of the quarters were too sharp and deep. That led to a really wide facing gap, or throat, over the crook of my foot, where the ankle meets the top of the instep. I was able to tape index card inside the quarters, eyeball new lines, and trim to shape fairly easily.
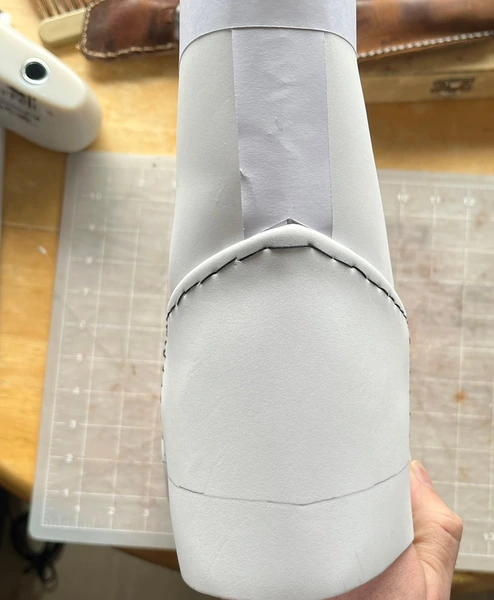
I realized only after I’d built the prototype that I left out any concave curve at the top of the vamp, between the tabs, for sewing the tongue. I was able to add one by gluing on a bit of index card. This was also easy to do and adjust.
It was very easy to extend the quarter further up my leg with flat pieces of card stock. I originally patterned for a shorter boot just to fit on the sheets of paper I was using.
I am still not quite sure how to handle the top of the seams between the counter cover and vamp. I plan to do beading or piping there, as on a western boot. But that will leave an exposed end of beading at the top, with no pull loop to cover it. I may need to prep lines of beading that taper to a point at the top.
Or just give up and sew one part over the other. I am a bit concerned about the big, inward facing stack of layers that western boots usually have. That may be more acceptable for pull-on boots, whose heel boxes fir more loosely than lace-ups’.